Sunday, 3 February 2013

Rhubarb, Meringue and Vanilla Cake


 I only wanted a Victoria Sponge, just something to fill the cake shaped hole in my life currently. I even bought some raspberry jam which is now sitting, neglected, in the cupboard.
Then I went to the market and it just went all downhill from there because we are now on the edge of my second favourite food season (1st: Tomatoes) which is Rhubarb. Currently Yorkshire Forced Rhubarb is currently becoming available if you keep your eyes peeled, although it's quite hard to miss with its bright day-glo pink colour and it metre plus length. Give it a few months and the normal stuff will take over which my local butcher informed me is currently all leaf and no stick.


So having spied and bought a few sticks, the question is what to do with it? Well to be honest I didn't have a clue, this cake is entirely the subject of my whims at that moment.

I'm gonna need a bigger boat board
Firstly I made the cake, fairly standard sponge technique, the cream was already decided for the original sponge I was going to do. At this point I had planned to gently stew the rhubarb, just in water, until it softened to go in the middle.

As the cakes were in the oven, I was staring blankly at some spare eggs at which point I decided mini meringues would be nice on top and having haven't made them before, I thought it would be cool to have a go, so I made a few dozen, (egg white goes a long way) I left them in the oven to dry overnight.

So Sunday arrives and my plan to poach the rhubarb in water was annoying me so I upgraded to a sugar syrup and dropped in half a split vanilla pod and poached gently until soft, then because I can't stop at times, I decided to caramelise some other bits of rhubarb in the same way I did for a previous cake.
 
so...yeah, after some assembly. I now have cake and the cake shaped hole is filled.

Ingredients
Cake
300g butter, softened
300g SR flour
300g Sugar
6 eggs
1 tsp vanilla extract

Filling
150g double cream
1 vanilla pod
150ml water
75g sugar
1 stick of rhubarb (about a metre) cut into chunks 2-3 inches long

Meringue
2 medium egg whites
50g caster sugar

Caramelised rhubarb
1 stick of  rhubarb (about a metre) cut into chunks 2-3 inches long.
100g caster sugar
10ml water

Method
Cake
Cream the butter and sugar together until fluffy.
Beat in the eggs, one at a time, ensuring each egg is fully mixed in.
Fold in the flour until a smooth batter is made.
Divide between two lined 18inch cake tins.
Bake in a preheated oven at 160C (fan) for about 30 minutes until a skewer can be removed clean.
Leave to cool on a wire rack.

Meringue
Whisk up the egg whites until stiff peaks form.
Add the sugar a tablespoon at a time whilst constantly whisking. as soon as it is all whisked in then stop.
Pipe on to a tray lined with foil into small mounds.
Bake in a preheated oven for 1 1/2 to 2 hours at 100C (fan).
Leave to cool and dry completely in the oven after baking.

Rhubarb filling
Dissolve the sugar with the water over a gentle heat, add half a vanilla pod, split down the middle.
When gently simmering, add the rhubarb and poach for a couple of minutes until they begin to soften, remove and allow to cool. then slice the little sticks in half.

Caramelised rhubarb
Slice the sticks into half and place on a chopping board, pink side up.
Gently heat the sugar and 10ml of water. swirl gently to ensure all is melted. slowly bring to the boil. Watch the colour, if the edges begin to darken swirl the pan to mix it up. Boil gently until a golden colour is formed.
Drizzle the caramel over the sticks and allow to cool and set.
The stray caramel can be broken up and added to the cake as decoration, I made little platforms for the top meringues.


Assembly
If your cakes are bit off centre, trim them until they are level.
Pour the cream into a bowl and remove the seeds from the other half of the pod and drop in. whisk until smooth and soft peaks form.
Spread over one side of the cake.
Arrange the poached rhubarb in the middle and crush up some of the uglier meringues and sprinkle them across.
Place the other side of the cake on top.
Dust with icing sugar then arrange the caramelised rhubarb and meringues however you like.

Enjoy.


Saturday, 26 January 2013

Shakshuka


This is rapidly becoming one of my favourite dishes. On its own, reduced to its bare essentials it's a stew like mix of tomatoes, peppers, onions and herbs. That alone would make it epic, especially at the height of tomato season (not long now) where a solitary tomato, fresh off the vine, is an explosion of flavour. It is jam packed full of vegetables (well technically fruit) and served alongside some good bread makes it a very filling and healthy dish to start your day or finish it which ever you prefer.
What I like about this dish though is its adaptability. It is infinitely changeable depending on your mood, whims or contents of your fridge. You could vary the herbs or increase your favourite. Add small chunks of salty feta, which I did today in this version and it was excellent. You could fry in some chorizo or throw in a pinch of smoked paprika, the list is endless.

I am submitting this to two excellent blogger challenges, Herbs on Saturday by Karen at the beautiful Lavender and Lovage which is hosted, this month by Vanesther at banger mash chat  and Breakfast club from Fuss Free Helen, this month hosted by Janice at the lovely Farmersgirl Kitchen with the theme of cooked breakfast.

This version is based on Ottolenghi's recipe in Plenty and the Guardian Website. I had a version of this at his superb Islington deli/restaurant where it was served with grilled foccacia and Labneh which is a soft cheese with a similar flavour to sour cream.

Shakshuka (feeds 3 - 4)
Ingredients
1/2 tsp cumin seeds
1 red and 1 yellow pepper
1 white and 1 red onion
4 - 5 tomatoes
2 tsp brown sugar
2 tbsp chopped coriander
2 tbsp thyme sprigs
1 bay leaf
pinch of cayenne
Salt and Pepper
1 egg per person
chunks of feta

Method
Dry fry the cumin seeds over a high heat for a minute or so. add a couple of tbsp of oil and ad the onions.
Fry for 5 minutes until soft then add the peppers, herbs and sugar and cook until golden and soft.
Add the tomatoes, cayenne and season well.
Cook gently for 15 minutes until the tomatoes break down and a consistency of a pasta sauce is formed, you may need to add a splash of water.
Now either in one large frying pan, where everybody can dive in, or in separate little frying pans, make a little gap for each egg and crack in enough eggs for the amount of people you are serving.
Dot with chunks of feta and either oven bake for 10 minutes, until the egg is cooked or place on the hob and bubble through until the eggs are cooked.
Serve with plenty of bread to mop up the juices

Enjoy.


Monday, 21 January 2013

Red Flannel Hash

After making Salt Beef yesterday, the obvious next question is what to do with it. There is only so many beef and mustard sandwiches one can eat. RCM pointed me in the direction of a recipe for a Red Flannel Hash named after New England's red flannel cloth and is a traditional American way to use up salt or corned beef. The beetroot in the recipe gives it a deep red colour, hence the name.

I do like a good hash, perfect stodgy comfort food for this heatwave we are currently going through. They are nutritious and an easy way to mainline vegetables. The recipe in the book is fairly basic so I decided to adapt it a bit according to what was in my kitchen. In this case; I added a few carrots, a mix of red and white onions and an absolute stroke of genius: half a teaspoon of smoked paprika which added a superb kick and a delicious smokey undertone.

Red Flannel Hash (makes enough for 3ish people)
Ingredients
3 medium spuds or two big spuds, chopped into chunks
2 carrots, sliced
2 onions, sliced, mix of colours if you like
a good handful of shredded salt beef
150g cooked beetroot (not pickled), rroughly chopped
1/2 tsp smoked paprika
Salt and pepper

Method
Boil the potatoes and carrots until soft and roughly mash them together.
Fry the onions in oil for about 10 minutes until golden and soft. Season well and add the paprika.
Add the beef, beetroot and mash and mix together thoroughly.
Fry on one side until it starts crisping up then start turning sections, crisping as much as possible.
When it sufficiently crispy (to your liking) pile onto plates and serve with some green veg or on its own with a condiment of your choice (HP for me).


Sunday, 20 January 2013

Salt Beef

On my last trip to London Town, We, as is becoming customary, went to the fantastic Borough Market for breakfast.


I opted for a delicious sounding Salt Beef sandwich with mustard and pickles. It was superb, soft and juicy, not overly salty beef, crunchy pickles accompanied by the burn of English Mustard all served in between a thick slice of sourdough bread.


Stop imagining it and have a look....


On my return home, I had a browse through River Cottage Meat to see if there was a recipe in there and lo and behold on page 438 there it was.

It's a slow recipe that can take the best part of a fortnight to make depending on the size of beef and the amount of salty flavour you want. I only had a small cut of brisket so I left mine in the brine for 5 days (up to 10 for bigger cuts) before fresh water soaking for 24 hours and then poached for just under two hours.

Ingredients (for a kilo of brisket)

1kg of brisket

Brine
2.5 litres of wate
250g brown sugar
750g sea salt
1/2tsp black pepper
1/2tsp juniper berries
3 cloves
2 bay leaves
Sprig of thyme

Poaching liquid
Water to cover
1 bouquet garni
1 of each chopped: carrot, onion, leek
1/2 garlic bulb, sliced horizontally

Method
Make the brine by adding all the ingredients to  large pan and bring to the boil until the salt/sugar dissolves completely. Leave to cool
Once cool, place the beef into a plastic bowl or similar (not metal), covered with the brine for 5 days, any longer for a cut this size will be too much and completely pickle it. Weigh it down if required with a small plate.
After 5 days, drain the brine and replace with cold fresh water for 24 hours, change the water once during this time.
Add all the vegetables, herbs and beef into a large pan, cover with water and bring to a gently simmer for 2 hours.
Remove from the pan, leave to rest then serve.

Verdict
The result was a juicy and surprisingly tender piece of beef a bit different from the one in Borough Market but I suspect that had been slow cooked for the best part of a day and used saltpetre which preserves the colour of beef. never the less, it was very good, not my first choice for a Sunday lunch but in between some good bread with fried onions and mustard it was delicious.

Friday, 28 December 2012

Shortloin of Beef

I am not a fan of turkey, it's all well and good in a sandwich or a pie or something but as the centrepiece of the meal of the year then just no and don't play the 'it's traditional' card either, it's not. Have a goose if you want to be traditional. Personally I like to have something a little tastier and this year I was drawn to the shortloin of beef.

The shortloin, is arguably the finest part of the noble cow, the crowning glory. it consists of the spine down the centre with the Fillet on one side and the Sirloin on the other, it is superb.

To cook this I turned to the balded headed genius/nutcase himself with the recipe in his excellent book Heston at Home.

I say recipe, its barely that as there is little effort involved apart from browning the outside at the start which takes some effort depending on the size you bought, ours barely fit in the frying pan.

The meat is then slow roasted and I mean slow roasted for the best part of 6 hours at 60 degrees Celsius. yes, 60 degrees, I've had baths hotter than that.


What this does to the meat is nothing sort of magical, the outside drys up and forms a wonderful seasoned crust but the inside stays moist to the point all the juice gushes out like a waterfall when it's done (collect it and pour it straight into the gravy). The meat cuts like butter because it's been gently warmed and not been blasted with heat. This also allows precision to cook it how you like from 45C (blue) where the cow is still walking round the field to 70C (well done) where you should be eating turkey if you cook it like this. I opted for 55C which is medium rare.

Cooking this way is stressful, not due to the work load but the stress of watching a thermometer creep up degree after degree when all you want to do is get on with eating it, the last couple of degrees I don't think I took my eyes off it.

I can't imagine cooking a joint in any other way after this. Heston, I salute you.


Sunday, 16 December 2012

Rice Pudding Pork

The Ghost of Christmas Past is the theme of Random Recipes at Belleau Kitchen this month. Well to be more precise it's last years recipe books that RR participants received and now have to pick from.

For me, I received two weighty tomes in the form of River Cottage Fish and River Cottage Meat. With a trusty flip of a coin River Cottage Meat won. So far so good. I had visions of lovely roasts, maybe a side of ribs when I flicked randomly through the book.

The recipe I landed on was Rice Pudding Pork....right.....

must not turn the page....will persist....it might be nice...swears violently in the direction of Belleau Cottage....sighs...accepts the inevitable...

Reading the recipe, it didn't seem too bad, no actual rice pudding involved and the recipe is based on a traditional Italian dish of braising pork in milk, fellow food blogger Clare at Feast and Glory made a version using Garlic and Rosemary which turned out very tasty by the sound of it. This version uses bay and thyme. It also uses brown sugar and nutmeg to give it hints of a rice pudding.

The recipe is fairly simple:

Rice Pudding Pork
Ingredients
2-2.5 Pork loin, rolled and boned.
gratings of fresh nutmeg
olive oil
50g butter
1-1.5 litres whole milk, hot
2 tsp brown sugar
3-4 bay leaves, fresh if possible
3 sprigs of thyme
zest of one lemon
salt and pepper

Method
Season the pork with salt and pepper and grate over nutmeg.
Heat the oil in a pan and sear the pork on all sides until nicely browned.
Leave in the pan.
Melt the butter in a saucepan large enough for the pork, stir in a third of the hot milk and sugar.
Place the pork in the pan and pour over the remainder of the milk.
Add the bay, thyme and lemon a couple more gratings of nutmeg and bring to barely a simmer.
Very gently simmer for about 1 and a half to two hours.
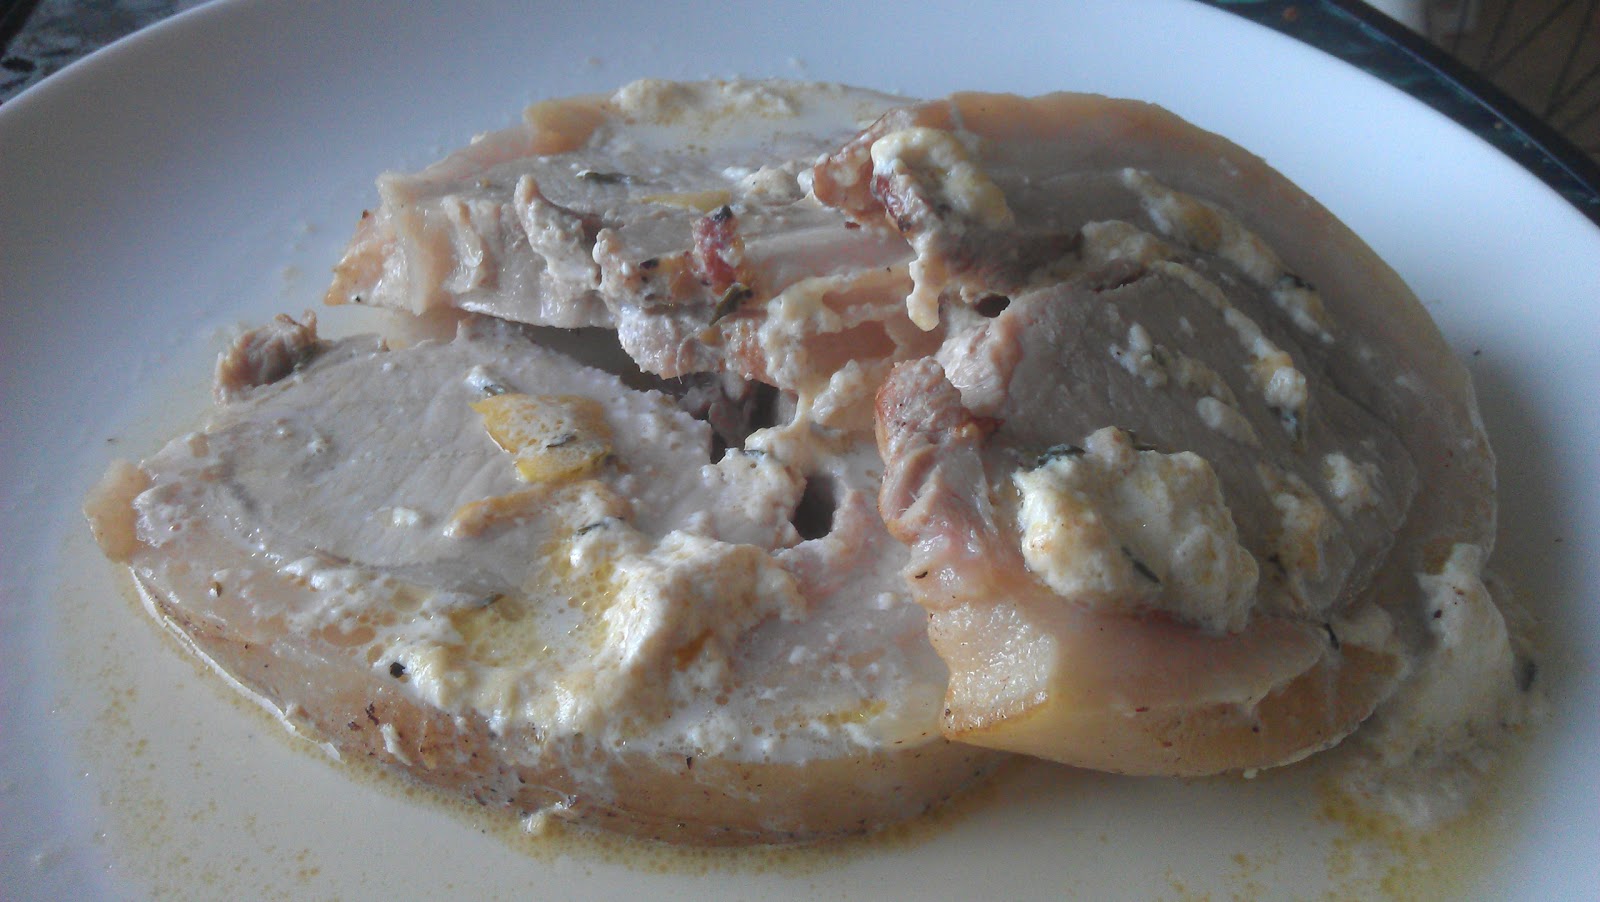
Allow the pork to rest out of the pan and serve with the sauce and the curdles of milk from the pan.

Verdict
Well that's not half bad actually, soft very slightly milky pork in a slightly too sweet sauce with hints of thyme and nutmeg. The curdles of milk are very very good, soft and creamy. If I were to do this again I would try it with garlic and rosemary as it sounds more up my street and hopefully not as sweet.


Wednesday, 12 December 2012

An Adventure in Bread

I cannot recall the last time I made a loaf of bread, in fact I'm almost positive I've never made one properly before.

Sure I have made the odd pizza dough but there is no substitute for taking the time to produce a fresh loaf from combining the ingredients into a soft, slightly sticky dough...to kneading it so it is stretchy and smooth...to waiting (impatiently) for it to rise and commence its quest to leave the bowl and take over the kitchen ... to watching it bake in the oven, filling the kitchen with that lovely fresh baked bread aroma and finally to eat it, still warm and soft with plenty of butter.

So I have decided to change all that and dive into the world of bread and have a look around, try out a few recipes, develop my own (currently lacking) knowledge and skills and to tell Dr Atkins etc... where they can shove their no carb diets.

To begin with I have started with the basic loaf recipes, to get into the swing of things regarding techniques, ingredients and also patience, I'll stop shouting at dough 'to get on with it' at some point.

There are many versions of this basic recipe, usually regarding techniques. Some people have no knead recipes, others like a good knead every now and again. I belong to the latter. I'm a bit of a traditionalist and like the kneading process of working the dough and stretching the gluten. I used a Paul Hollywood recipe for my first loaf which is available here and this is what happened:

Not too bad at all. I did like some of the tips that Hollywood suggests, I have heard them before but never put into practice such as using oil instead of flour on the work surface and proving bowl and the roasting tray of water in the bottom of the oven.

So happy with the first effort, I decided to adapt that recipe, sticking to the dry ingredient quantities but replacing the white flour with wholemeal flour, I also increased the liquid amount to 400ish ml due to wholemeal flour absorbing more and this is what happened:


Result, two quality loaves which I have been stuffing my face with for the past few days. I am now slightly addicted to making the stuff when I get the time and looking forward to my next bready challenge.