I'm not normally a fan of risottos but this recipe from Good Food drew me in and practically forced me to cook it. I blame the chorizo, I love the stuff. beautiful in a rich tomato sauce or simply eaten with a platter of good cheese, bread and of course wine.
This recipe is like any good risotto should be; rich, creamy and with the added spice of the chorizo, perfect on a crisp autumn evening.
Chorizo and Broad Bean Risotto
Ingredients
1tbsp olive oil
100g smoked bacon, diced
2 shallots, chopped
2 garlic cloves, crushed
350g small cooking chorizo, diced
300g risotto rice
1 litre hot chicken stock
300g frozen broad beans
Method
Heat the oil in a medium sized pan then add the bacon, shallots, garlic and chorizo.
Cook gently for about 8 minutes
Add the rice and coat with the cooking juices.
Add just enough stock to cover the rice and bring to a simmer
Gently cook until absorbed
Continue adding a ladle at a time and gently cook.
Just before the final ladle, stir in the beans and cook for 3-4 minutes.
Serve and enjoy.
Welcome to my food world. Here you will find many recipes, the odd disaster and hopefully a little bit of inspiration. Enjoy
Tuesday, 18 October 2011
Sunday, 9 October 2011
Chocolate Chili Souffle
A blogger challenge that I've been following and reading for awhile is the We should cocoa challenge hosted by Choclette at Chocolate Log Blog and Chelle at the Chocolate Teapot, both excellent blogs and well worth a read. The We should cocoa challenge is a challenge based around chocolate and a special ingredient, previous ingredients have included rose and apricot to name a couple. This months challenge was chili so for once I thought I'd enter.
Chocolate and chili are one of the greatest flavour combos dating back to the Aztecs and Mayans. I'd previously had a venture into chocolate/chili with a cake I made ages ago so obviously I couldn't do that again. I had been wanting to make souffle for a while now and this recipe is not quite a proper one, I'm working my way there. According to BBC Food these are more sturdy than normal souffles.
The recipe used is for a basic chocolate souffle which I have adapted to encompass this months special ingredient...
Chocolate Chili Souffle
Ingredients (makes 3)

100g Dark chocolate
75g butter plus a little for greasing
3 eggs
85g caster sugar
60g Plain flour
Half a red chili, finely chopped
Method
Heat the oven to 180C/160c (fan)
Butter 3 ramekins or cups like i did
Melt the chocolate with the butter in a bowl over a pan of simmering water
Beat the eggs with sugar until fluffy and light
Add the chili to the flour
Fold in the flour/chili and then the chocolate mixture
Divide between the ramekins, the mixture can be now put in the fridge for later if you like
Bake for 8-12 minutes until the souffle rises and a crust forms, the middle should be still slightly gooey
Serve with cream
Enjoy
Verdict
sooooo good, rich, dark, chocolaty with little kicks of chili, beautiful.
Saturday, 8 October 2011
Creamy Chicken and Pumpkin
My aim this month is to complete and enter more than one bloggers challenge, I usually enter Doms brilliant random recipe challenge but this month I wanted to spread my wings...
I spied a nice little challenge over at What Kate Baked asking us to submit recipes based on an autumnal theme. My first thought did spring to a pumpkin pie, having never made one and every year promising myself I will make one, but with the last random recipe challenge finishing up with me cooking another tart, I decided to have a browse at what else I could cook. I stumbled across this nice little recipe on BBC Good Food and decided to give it ago.
Creamy Chicken and Pumpkin
Ingredients
20g pack dried porcini
1.5kg free range chicken, jointed in 8 pieces
1 lemon, halved
2 tbsp olive oil
25g butter
1 small onion, finely chopped
300g pumpkin, peeled, seeded and cut into 2cm cubes
200g chestnut mushrooms
284ml carton double cream
Method
Soak porcini in 300ml hot water for 30 mins.
Skin chicken and rub with lemon
Heat oil in a pan and brown chicken on all sides
Transfer to a casserole dish
Heat oven to 180C/160C(fan)
Melt the butter in a medium pan, once it stops foaming, add the onion and fry until golden
Remove the porcini from the water, rinse, pat dry and chop small.
Strain the porcini water, leaving the last spoonful.
Add the porcini and pumpkin to onions and saute for 5 minutes.
Add the fresh mushrooms and fry for a further 5 minutes
Stir in the cream and 5 tbsp of the porcini water
Simmer for 10 mins until slightly reduced
Pour over the chicken
Cover and cook for around 40 minutes, add a bit of water if the sauce becomes to dry.
Enjoy.
Verdict
Deliciously autumnal with lovely mushroomy flavours and sweet pumpkin. If you can't be bothered jointing a chicken just do what I did and buy 8 chicken thighs, sorted. Oh and brown the chicken more than I did, rookie mistake *hangs head in shame*.
I spied a nice little challenge over at What Kate Baked asking us to submit recipes based on an autumnal theme. My first thought did spring to a pumpkin pie, having never made one and every year promising myself I will make one, but with the last random recipe challenge finishing up with me cooking another tart, I decided to have a browse at what else I could cook. I stumbled across this nice little recipe on BBC Good Food and decided to give it ago.
Creamy Chicken and Pumpkin
Ingredients
20g pack dried porcini
1.5kg free range chicken, jointed in 8 pieces1 lemon, halved
2 tbsp olive oil
25g butter
1 small onion, finely chopped
300g pumpkin, peeled, seeded and cut into 2cm cubes
200g chestnut mushrooms
284ml carton double cream
Method
Soak porcini in 300ml hot water for 30 mins.
Skin chicken and rub with lemon
Heat oil in a pan and brown chicken on all sides
Transfer to a casserole dish
Heat oven to 180C/160C(fan)
Melt the butter in a medium pan, once it stops foaming, add the onion and fry until golden
Remove the porcini from the water, rinse, pat dry and chop small.
Strain the porcini water, leaving the last spoonful.
Add the porcini and pumpkin to onions and saute for 5 minutes.
Add the fresh mushrooms and fry for a further 5 minutes
Stir in the cream and 5 tbsp of the porcini water
Simmer for 10 mins until slightly reduced
Pour over the chicken
Cover and cook for around 40 minutes, add a bit of water if the sauce becomes to dry.
Enjoy.
Verdict
Deliciously autumnal with lovely mushroomy flavours and sweet pumpkin. If you can't be bothered jointing a chicken just do what I did and buy 8 chicken thighs, sorted. Oh and brown the chicken more than I did, rookie mistake *hangs head in shame*.
Corned Beef Pie
Ah corned beef, not the most glamorous or tastiest sounding ingredient but used the right way then its just superb.
We used to have it cold alongside fresh chips, fried eggs and beans. I used to put all four into a sandwich with a few pickled onions and tomato ketchup and then attempted to eat it before it disintegrated into a tasty mess.
This recipe is another way to use those forgotten tins in the back of the cupboard. It never lasted long once made and I have attempted to recreate it for you lot, due to not having the actual recipe it's from memory only. From the taste of it, I'm not far off.
I used a roasting tray for this about an inch deep and 29cm by 21cm
Ingredients
Pastry
600g Plain Flour
150g Butter
150g Lard
few tbsp of cold water (enough to form a dough)
1 egg beaten (for the glaze)
Filling
1 and a 1/2 tin of Corned Beef
4-5 medium potatoes
2-3 onions
Black pepper.
Method
Rub the lard and butter into the flour until the mixture resembles breadcrumbs
Add the water a tbsp at a time and mix with a knife and your hands until the mixture comes together into a smooth dough.
Wrap in clingfilm and chill for about half n hour.
Filling
Peel and chop the potatoes into chunks, boil in a pan of water until soft.
Transfer to a bowl and add the corned beef and plenty of black pepper, mash together using a potato masher.
Fry the onions gently until soft, try not to brown too much.
Leave to cool both to completely, otherwise soggy pastry beckons.
Assembly
Grease your chosen pie dish or tray.
Divide the pastry into two and roll out to the desired length.
Place one half into the dish and press gently into the sides, trim off the excess pastry at the sides of the dish.
Add the onion in a thin layer, then add the mash and beef over the top, flatten down gently.
Brush egg round the edges of the pastry to help seal.
Place the other the half of the pastry over the top, trim off the excess and seal using a fork pressed gently all the way around.
Add any pastry decoration you like then brush liberally with the remaining egg.
Bake in a preheated oven for about 25 minutes until the pastry is golden brown.
Serve with onion gravy, fluffy mash and veg or simply have it cold with plenty of brown sauce.
Enjoy
We used to have it cold alongside fresh chips, fried eggs and beans. I used to put all four into a sandwich with a few pickled onions and tomato ketchup and then attempted to eat it before it disintegrated into a tasty mess.
This recipe is another way to use those forgotten tins in the back of the cupboard. It never lasted long once made and I have attempted to recreate it for you lot, due to not having the actual recipe it's from memory only. From the taste of it, I'm not far off.
I used a roasting tray for this about an inch deep and 29cm by 21cm
Ingredients
Pastry
600g Plain Flour150g Butter
150g Lard
few tbsp of cold water (enough to form a dough)
1 egg beaten (for the glaze)
Filling
1 and a 1/2 tin of Corned Beef4-5 medium potatoes
2-3 onions
Black pepper.
Method
Rub the lard and butter into the flour until the mixture resembles breadcrumbsAdd the water a tbsp at a time and mix with a knife and your hands until the mixture comes together into a smooth dough.
Wrap in clingfilm and chill for about half n hour.
Filling
Peel and chop the potatoes into chunks, boil in a pan of water until soft.
Transfer to a bowl and add the corned beef and plenty of black pepper, mash together using a potato masher.
Fry the onions gently until soft, try not to brown too much.
Leave to cool both to completely, otherwise soggy pastry beckons.
Assembly
Grease your chosen pie dish or tray.
Divide the pastry into two and roll out to the desired length.
Place one half into the dish and press gently into the sides, trim off the excess pastry at the sides of the dish.
Add the onion in a thin layer, then add the mash and beef over the top, flatten down gently.
Brush egg round the edges of the pastry to help seal.
Place the other the half of the pastry over the top, trim off the excess and seal using a fork pressed gently all the way around.
Add any pastry decoration you like then brush liberally with the remaining egg.
Bake in a preheated oven for about 25 minutes until the pastry is golden brown.
Serve with onion gravy, fluffy mash and veg or simply have it cold with plenty of brown sauce.
Enjoy
Thursday, 6 October 2011
Pork and pears
Some people seem to have a problem cooking for me. No idea why, I'm perfectly pleasant and easily pleased when it comes to food. The only time I will have something to say is when a food crime is committed, namely overcooking or ruining quality ingredients, such as well-done steak for example. All I want when someone cooks for me is a simple yet tasty dish, I'm not looking for Michelin star, throw everything at the plate for several hours and hope it works type of cooking. So after persuading the Other Half to cook me dinner one Saturday evening, she opted for a recipe out of Nigel Slater's Fast Food (brilliant book, buy it now), pork and pears.
When the evening came around.... well the battle lines were drawn. I was booted out of my own kitchen with some force and ordered not to comment on what was happening or even enter the kitchen. A quick venture into the kitchen to find wine and to check my kitchen hadn't exploded was met with a barrel of abuse, knives whizzing past my head, followed by a frying pan and then with some nifty kung fu moves I was booted back into the living room through the door, there is still a Me shaped hole in the actual door.
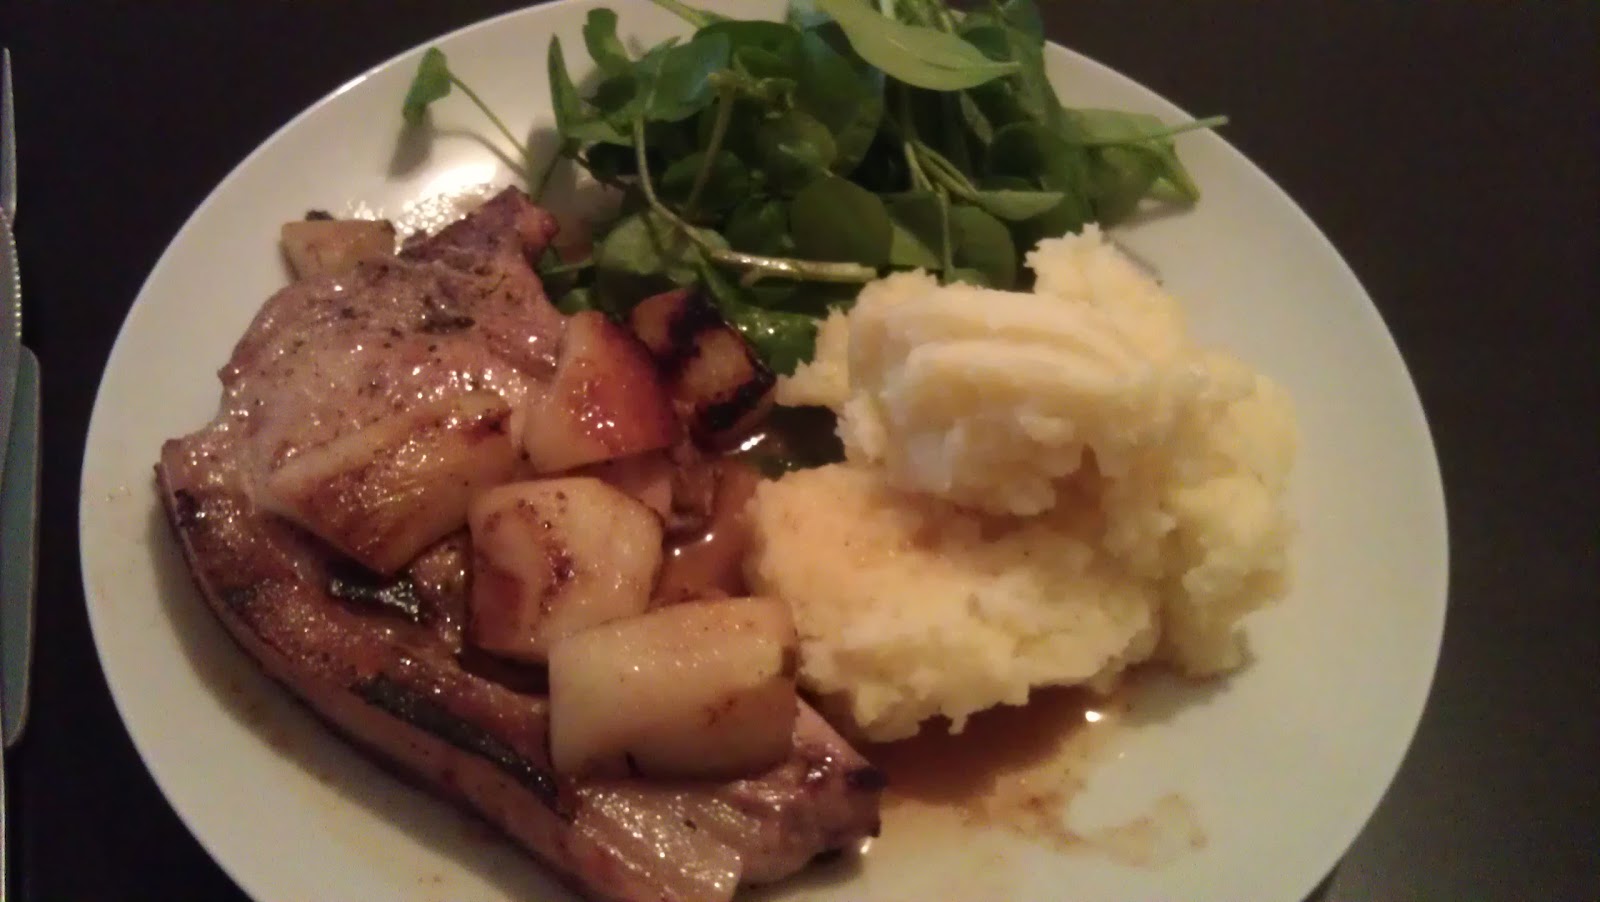
10 minutes later after regaining consciousness, a rather tasty meal appeared. Turns out pears are very tasty with pork. It was a lovely contrast between the the caramelised pears and the slight saltiness of the pork alongside fluffy mash and bitter rocket.
Having not witnessed the actual cooking for fear of evisceration, I assume it went similar to this:
Pork and Pears
Ingredients
2 loin pork chops
salt and freshly ground black pepper
2 tbsp olive oil
2 cloves of garlic (crushed flat and unpeeled)
2 ripe pears, cut into eights and cored, peeling optional
75ml dry white wine
75ml chicken/veg stock or water
Method
Season the pork with the salt and pepper
Heat the oil and garlic in a pan over a high heat, add the chops.
Seal on both sides
Turn the heat down and add the pears
Cook until both are tender and browned
Remove chops and pears to a warm plate
Pour most of the fat from the pan and return to the heat
Pour in the wine, scraping away the bits of pork and pear that are clinging to the pan
Add the stock and simmer until reduced by half
Pour over the chops and pears
Serve with fluffy mash and bitter leaves
Thursday, 29 September 2011
Chocolate and Orange Tart - A Random Recipe
This months random recipe challenge from Dom at Belleau Kitchen, was inspired by yours truly after last months challenge where I randomly went through my collection of Good Food Magazines in search of the elusive random recipe.
Having received the honour of inspiring a challenge, I felt I'd best take part otherwise an e-beating would no doubt occur.
So I gathered together a good handful of magazines and randomly choose the Easter edition from this year of which I landed on the chocolate section and hit a superb random recipe.
Now regular readers of this blog will realise that I like tarts .....OI!! stop sniggering in the back. There are various posts on here of my recent lemon tart and the fig tart which was another random recipe. So without further ado I give you this months random recipe....
Chocolate Orange Tart
Ingredients
Pastry
350g plain flour
200g butter , cubed
100g icing sugar
zest 1 orange
1 egg yolk , mixed with 2 tbsp water
Filling
250g dark chocolate
2 eggs , plus 1 white (leftover from pastry)
140g caster sugar
85g melted butter
85g plain flour
little cocoa , to serve
Method
Pastry
Rub the butter into the flour gently between your fingertips until mixture resembles breadcrumbs.
Stir in the sugar and zestAdd the yolk and water and mix together.
Using you hands bring together the mix into a dough ball, don't overwork.
Wrap tightly in cling film and leave to rest in the fridge for 30mins to an hour.
Get two sheets of cling film, spread one across the work surface, place the dough in the middle and spread the other sheet over the top.
Roll out gently in between the two sheets of cling film (this method stops any excess flour being added to the pastry and drying it out).
Remove the top layer and using the bottom layer drape the pastry into a 26cm fluted tart tin.
Press gently into the tart tin and using a rolling pin roll across the top to trim off the edges.
Push the edges up a couple of millimetres to compensate for shrinkage.
Gently press a layer of foil into the tin and fill with baking beans.
Bake in a preheated oven (180C) for 15 minutes.
Remove the foil and beans and bake for another 10 minutes.
Remove from oven and leave to cool on a wire rack.
Filling
Melt the chocolate in a bowl over a pan of simmering water
beat the eggs with the sugar until thick and pale
fold in the melted butter, flour and chocolate
Pour into the pastry case and leave to settle for a minute
Place in the oven at 160C/140C(fan) for 25 minutes
Remove and allow to cool slightly
Sprinkle over cocoa powder and serve warm with cream or ice cream.
Enjoy
Verdict
Just superb, crumbly orange pastry and thick gooey chocolate filling. I cheated a bit on this recipe, the recipe stated to make 8 deep individual tarts but I don't own the required equipment so I just made a big one. You will have enough pastry with plenty spare if you use a 26cm tin and the filling is exactly the right amount for a tray this size.
Thanks again to Dom for hosting and choosing me as his inspiration.
Saturday, 17 September 2011
Roast Chicken
I do love roast chicken. done properly it would be up there as one of my favourite foods. It baffles me why people are scared to even have a go at it. It's painfully simple and the results are oh so good. Living on my own, roasting a whole bird pretty much sorts out meals for the following few days. This one, which I found while aimlessly wandering round the supermarket in the reduced to clear section (last day of use by date) cost me 3 quid for a large free range chicken and lasted me 3 days, bargain.
Simple Roast chicken
Ingredients
1 whole chicken
vast amounts of fresh rosemary (or herb of your choice)
1 bulb of garlic. (this is the minimum amount, I've read recipes that range from 40 - 100 cloves of garlic)
lots of olive oil
salt + pepperMethod
Line a roasting dish with tin foil
Stick the chicky in the dish
Drown in olive oil
Scatter as many bulbs of garlic as you wish around it, stick some between the chickens legs and thighs also.
Sprinkle over your choice of herbage
Sprinkle over plenty of salt and pepper
Cover with a tin foil lid and place in a preheated oven at 180C until its done (supermarkets usually put a time on the packet so just use this if not then: 25 mins per 450g plus 15 mins extra.
Baste a few times during the cooking time and for the last 30 minutes take the foil lid off to allow the skin to brown up nicely.
Enjoy.
Subscribe to:
Posts (Atom)